Deleting a Control
Last updated: May 31, 2025
Deleting a control in Mycroft helps keep your control environment clean and accurate. Teammates may delete controls that are duplicate, outdated, or no longer relevant to current processes.
This prevents confusion, reduces clutter, and ensures reports and audits reflect only active, applicable controls—supporting better compliance and risk management.
Accessing the Controls Section
Navigate to the left navigation menu and click on
Controls.
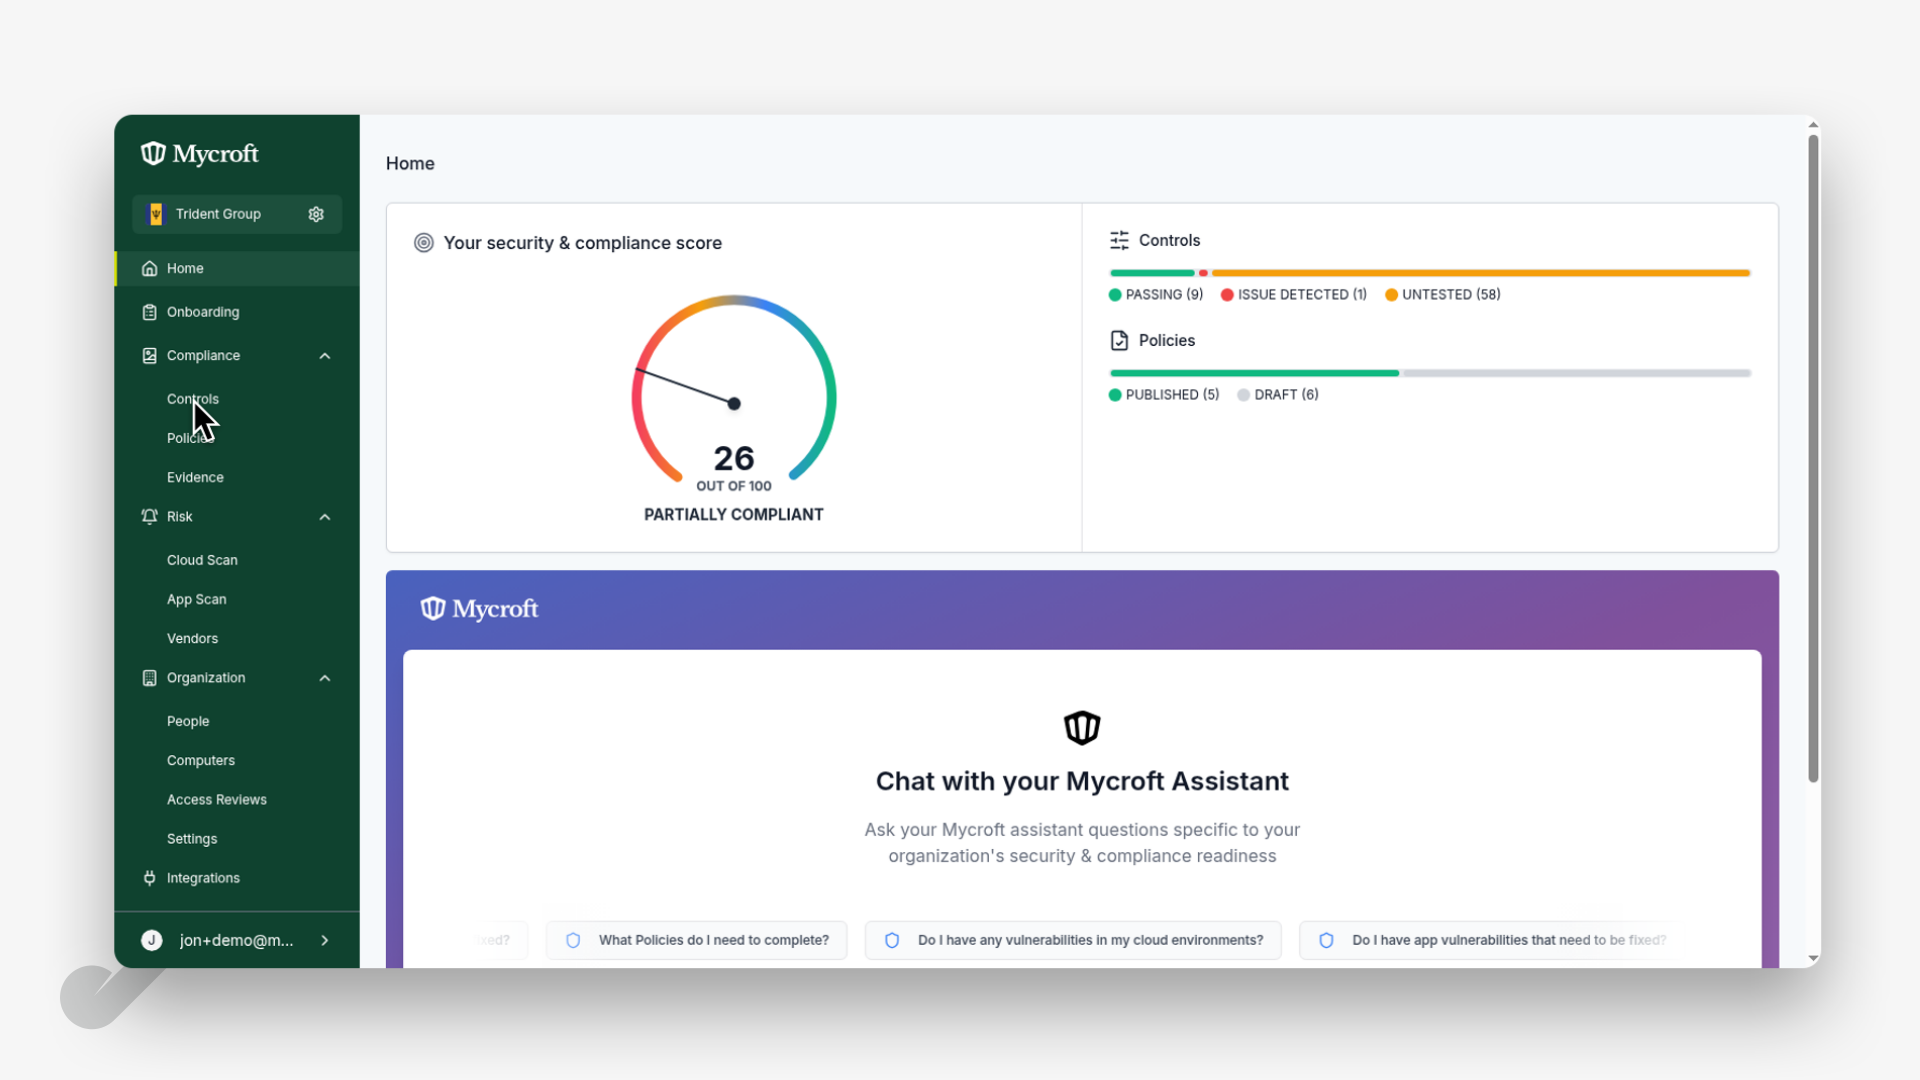
This will take you to the main Controls management page where you can view and manage all available controls.
Deleting a Control
Note: Deleting a control is permanent and cannot be undone. Make sure you have a backup or are certain you want to delete this control before confirming.
Follow these steps to delete a control from your system:
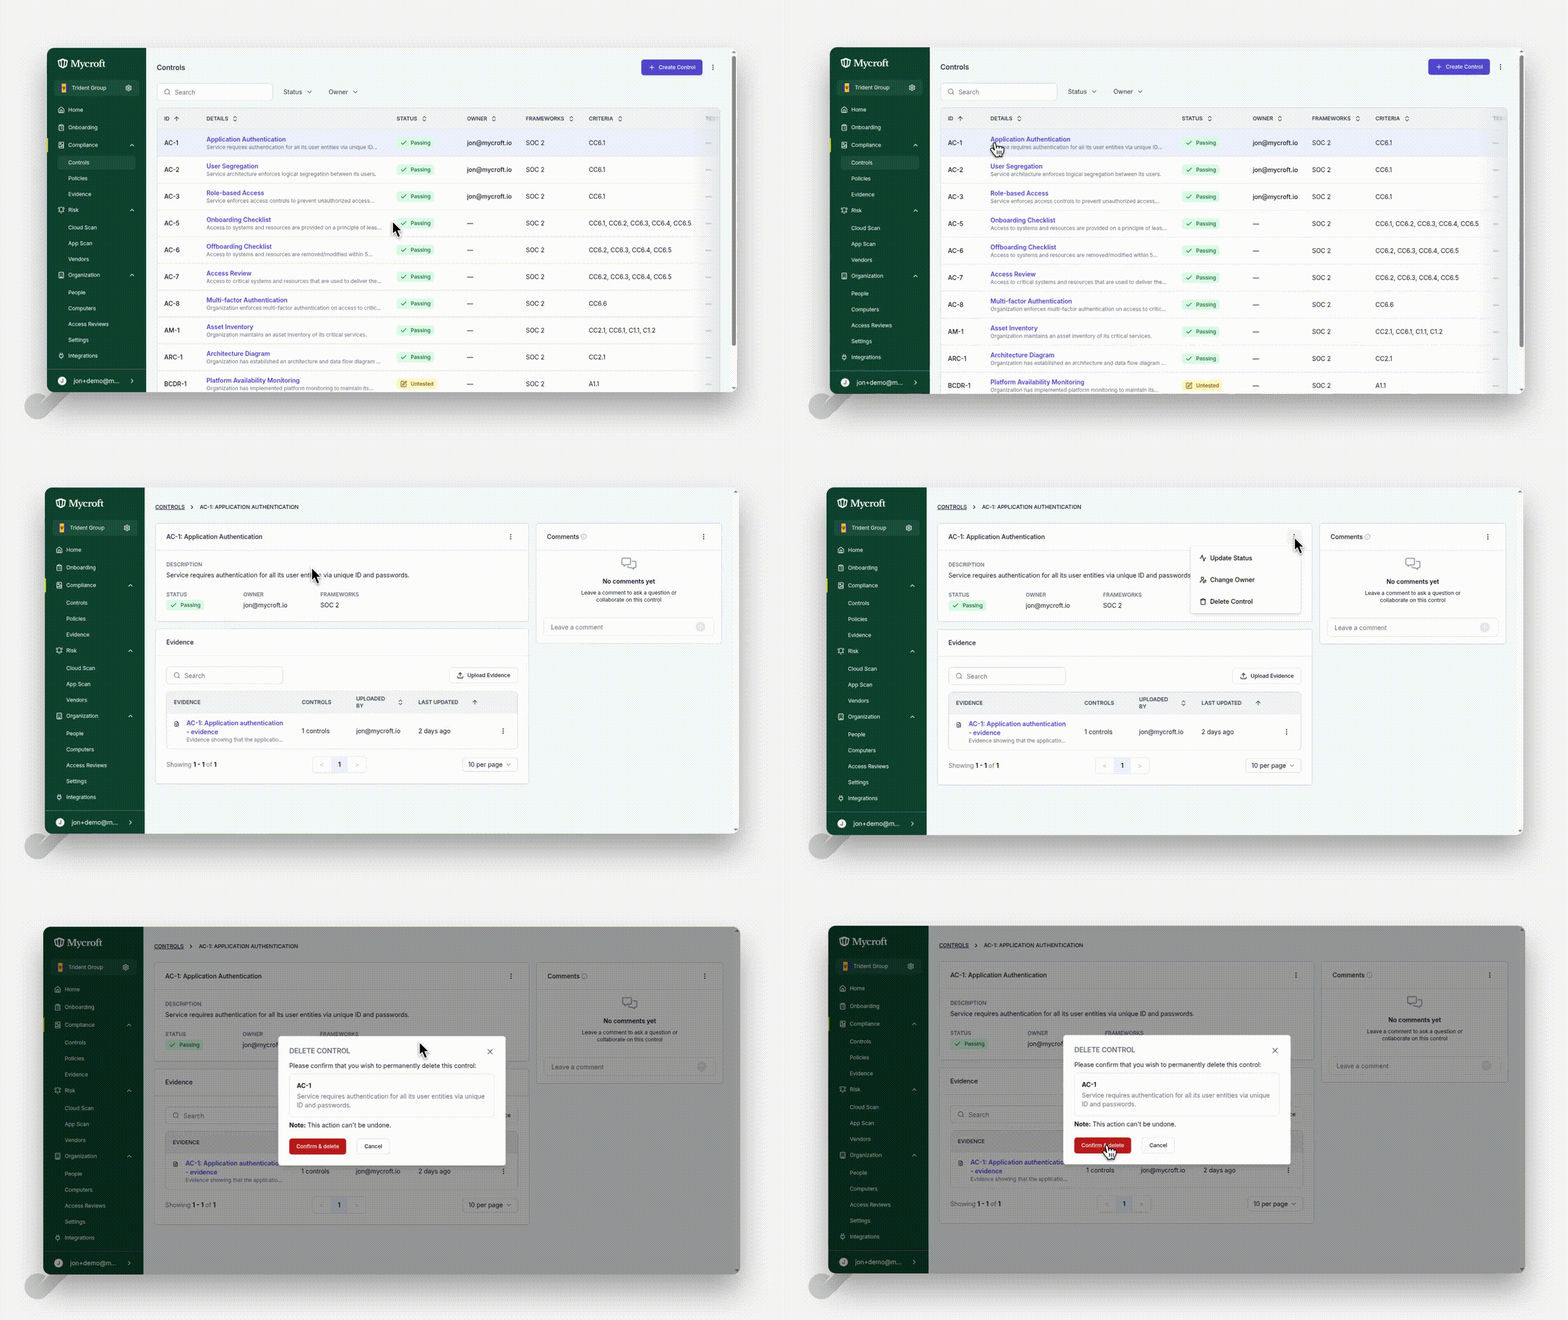
From the Controls list, locate and click on the control you wish to delete (in this example,
AC-1).Click the three-dot menu icon (⋮) to the right of the control to access available actions.
Select
Delete Controlfrom the dropdown menu.In the confirmation dialog that appears, click the
Confirm & deletebutton to permanently remove the control.
Verifying the Deletion
After deleting a control, it's good practice to verify that it has been successfully removed from the system:
Click on the
CONTROLSlink in the navigation breadcrumb to return to the main Controls listing page.Click on the search field at the top of the page.
Type the name or ID of the deleted control (e.g.,
AC-1).Review the search results - the deleted control should no longer appear in the listing.
Clear the search filters by clicking the clear button (✕) to return to the full Controls listing.
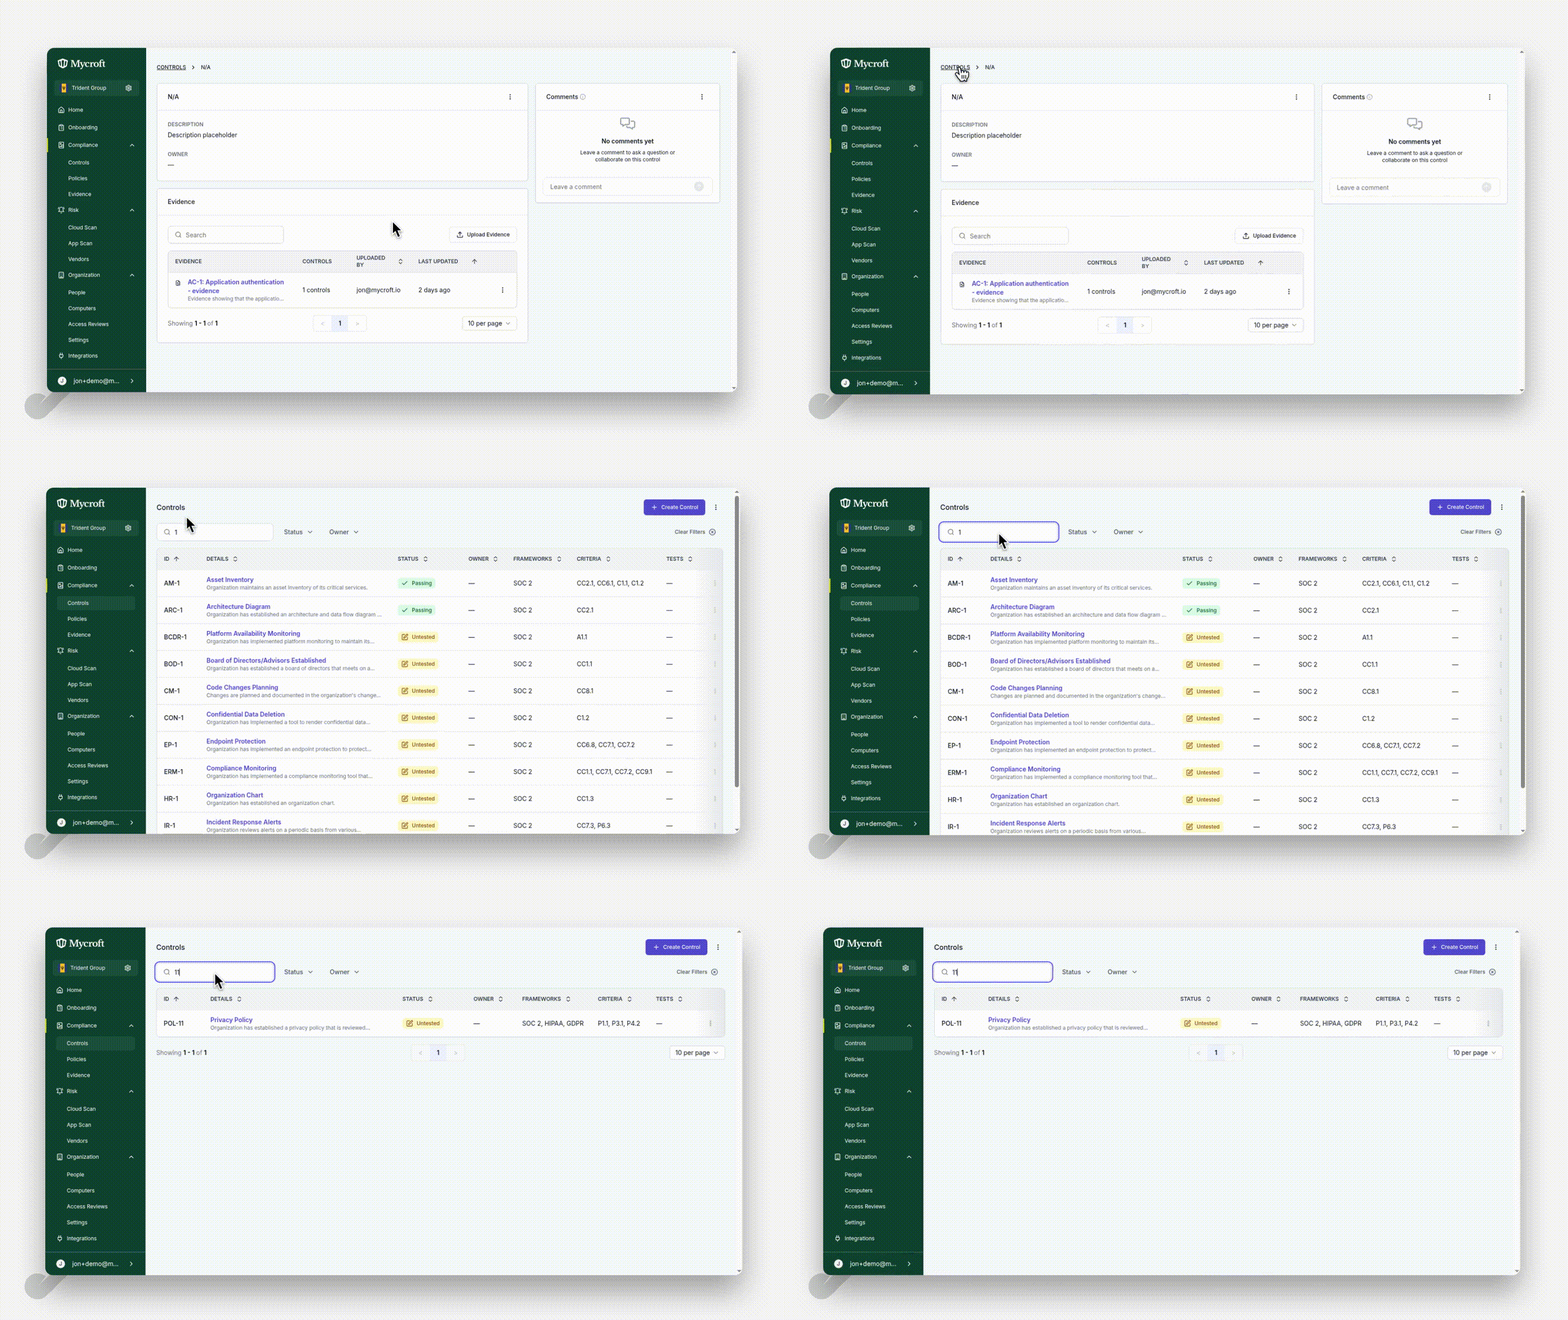
If the deleted control doesn't appear in your search results, this confirms that it has been successfully removed from the system.