Creating a Custom Control
Last updated: May 31, 2025
Creating a Control in Mycroft is a critical step in building a strong security and compliance foundation. Controls define the specific actions your organization takes to meet regulatory requirements, mitigate risk, and enforce internal policies. By creating and documenting Controls, teams can clearly demonstrate how security practices align with standards such as SOC 2, ISO 27001, or HIPAA.
This not only ensures operational consistency and accountability, but also simplifies audits and helps your organization pass critical security assessments with confidence.
Accessing the Control Creation Interface
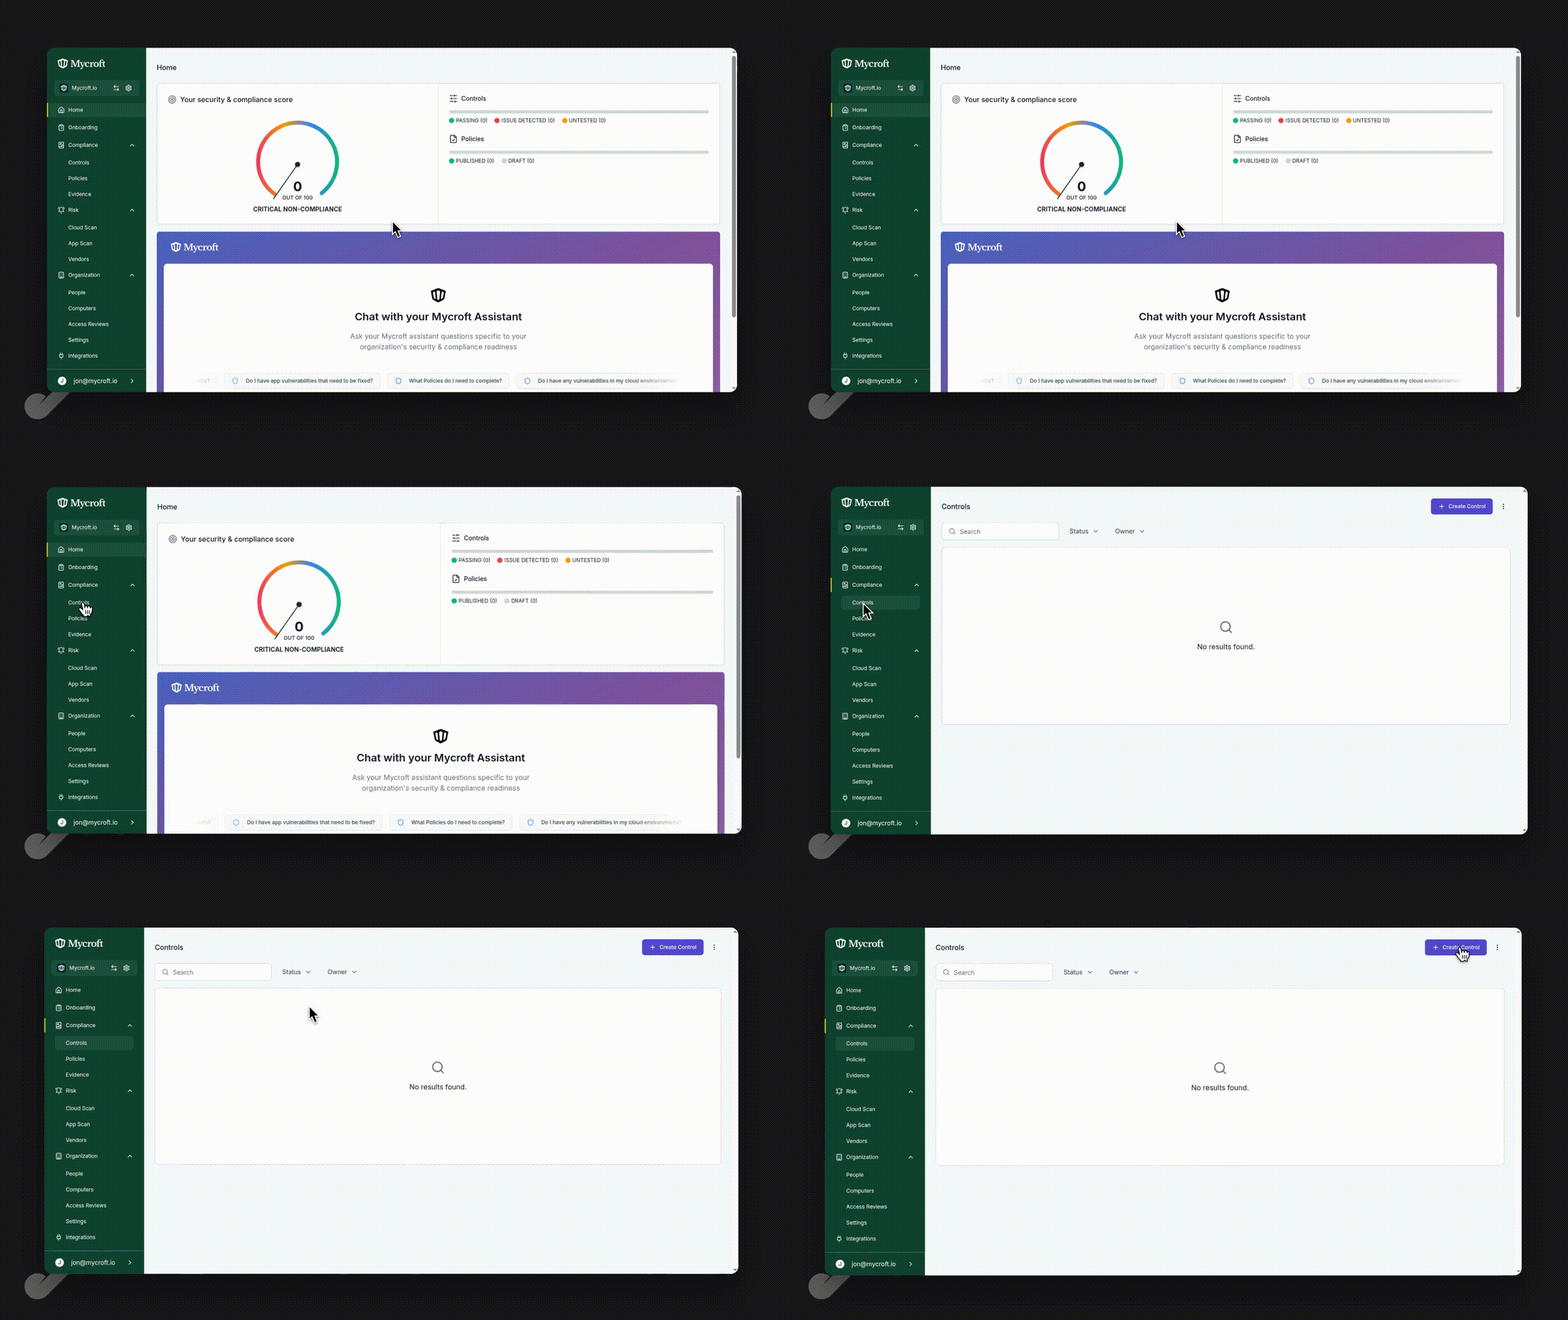
To create a new control in the system:
Navigate to the main dashboard
Click on
Controlsin the left sidebar to access the controls management sectionClick the
Create Controlbutton to initiate the new control creation process
What You'll See
After clicking the Create Control button, the system will display a form where you can input the details for your new control.
Entering Control Information
Complete the control creation form by filling in the following required fields:
Control Identifier: Enter a unique identifier for your control
This should follow your organization's naming convention
Example:
SEC-001
Control Title: Provide a clear, descriptive name for your control
Example:
Data Encryption at Rest
Description: Enter a detailed description explaining:
The purpose of this control
What this control monitors or enforces
Any specific implementation details that are relevant
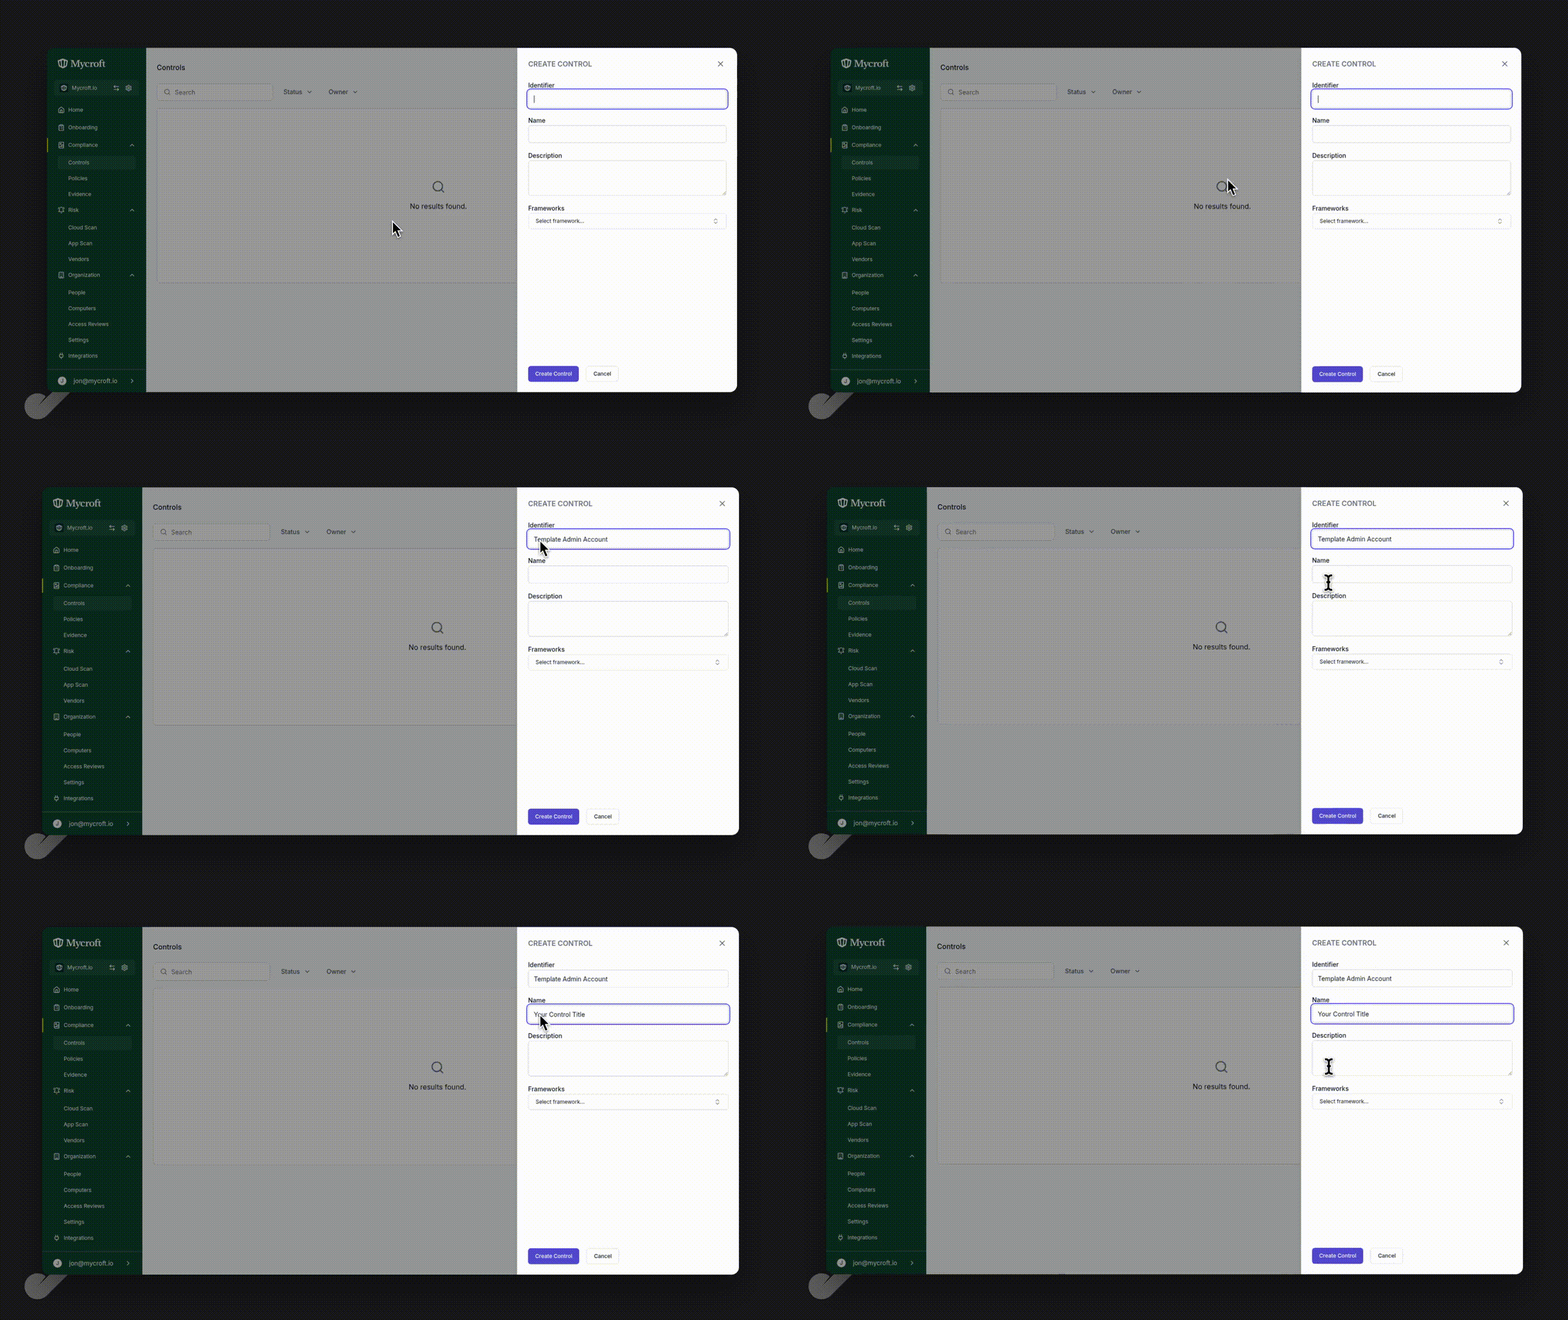
Tip: Write clear, concise descriptions that explain both the purpose and expected outcome of the control.
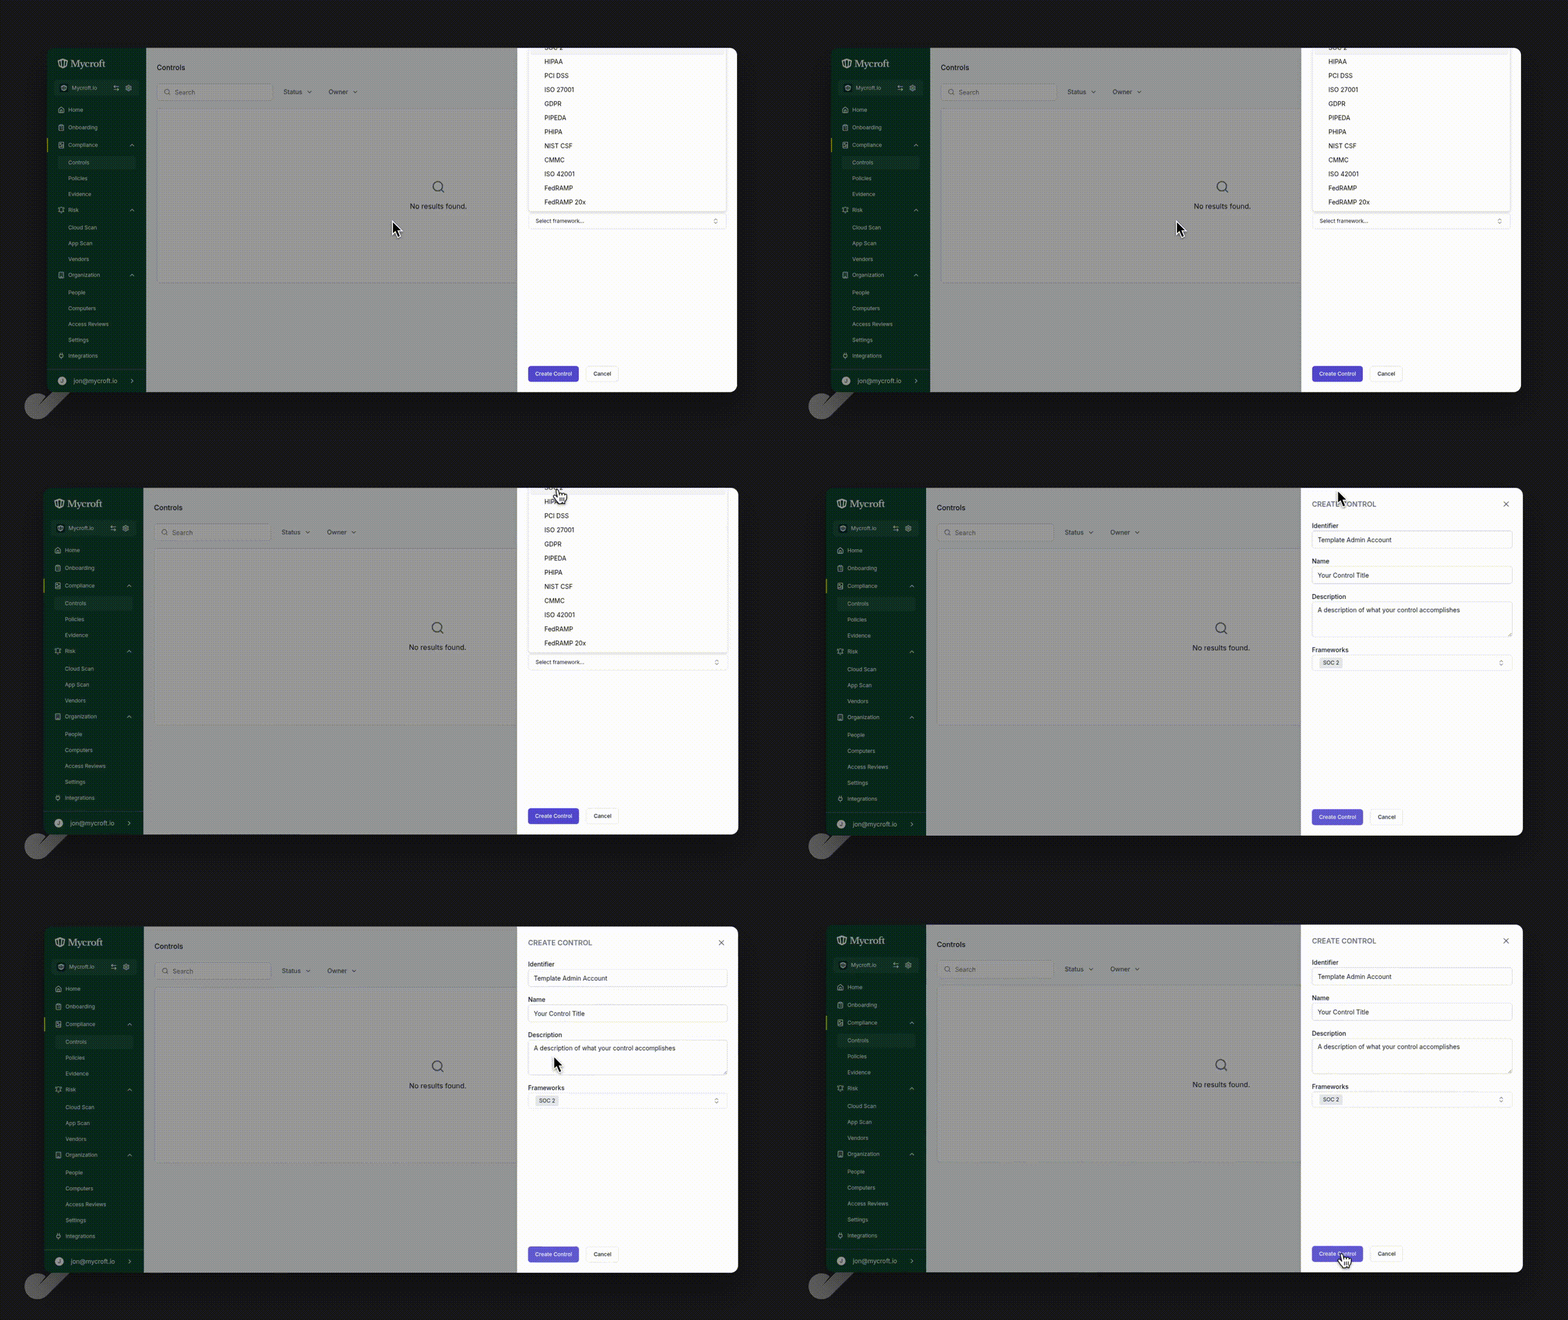
Selecting a Framework and Creating the Control
From the dropdown list, select the relevant framework (e.g.
SOC 2) as the compliance framework for this controlThis associates your control with the appropriate compliance requirements
The system will automatically link relevant SOC 2 criteria to your control
Review all entered information for accuracy
Click the
Create Controlbutton to complete the process
Confirmation
After successful creation, the system will display your new control in the Controls list where you can further manage and monitor it.